AI Video Editor
Once your script and voiceover are generated, VideoMule opens your project in the video editor. This is where your video, audio, and captions all come together on a timeline.
Editor Overview
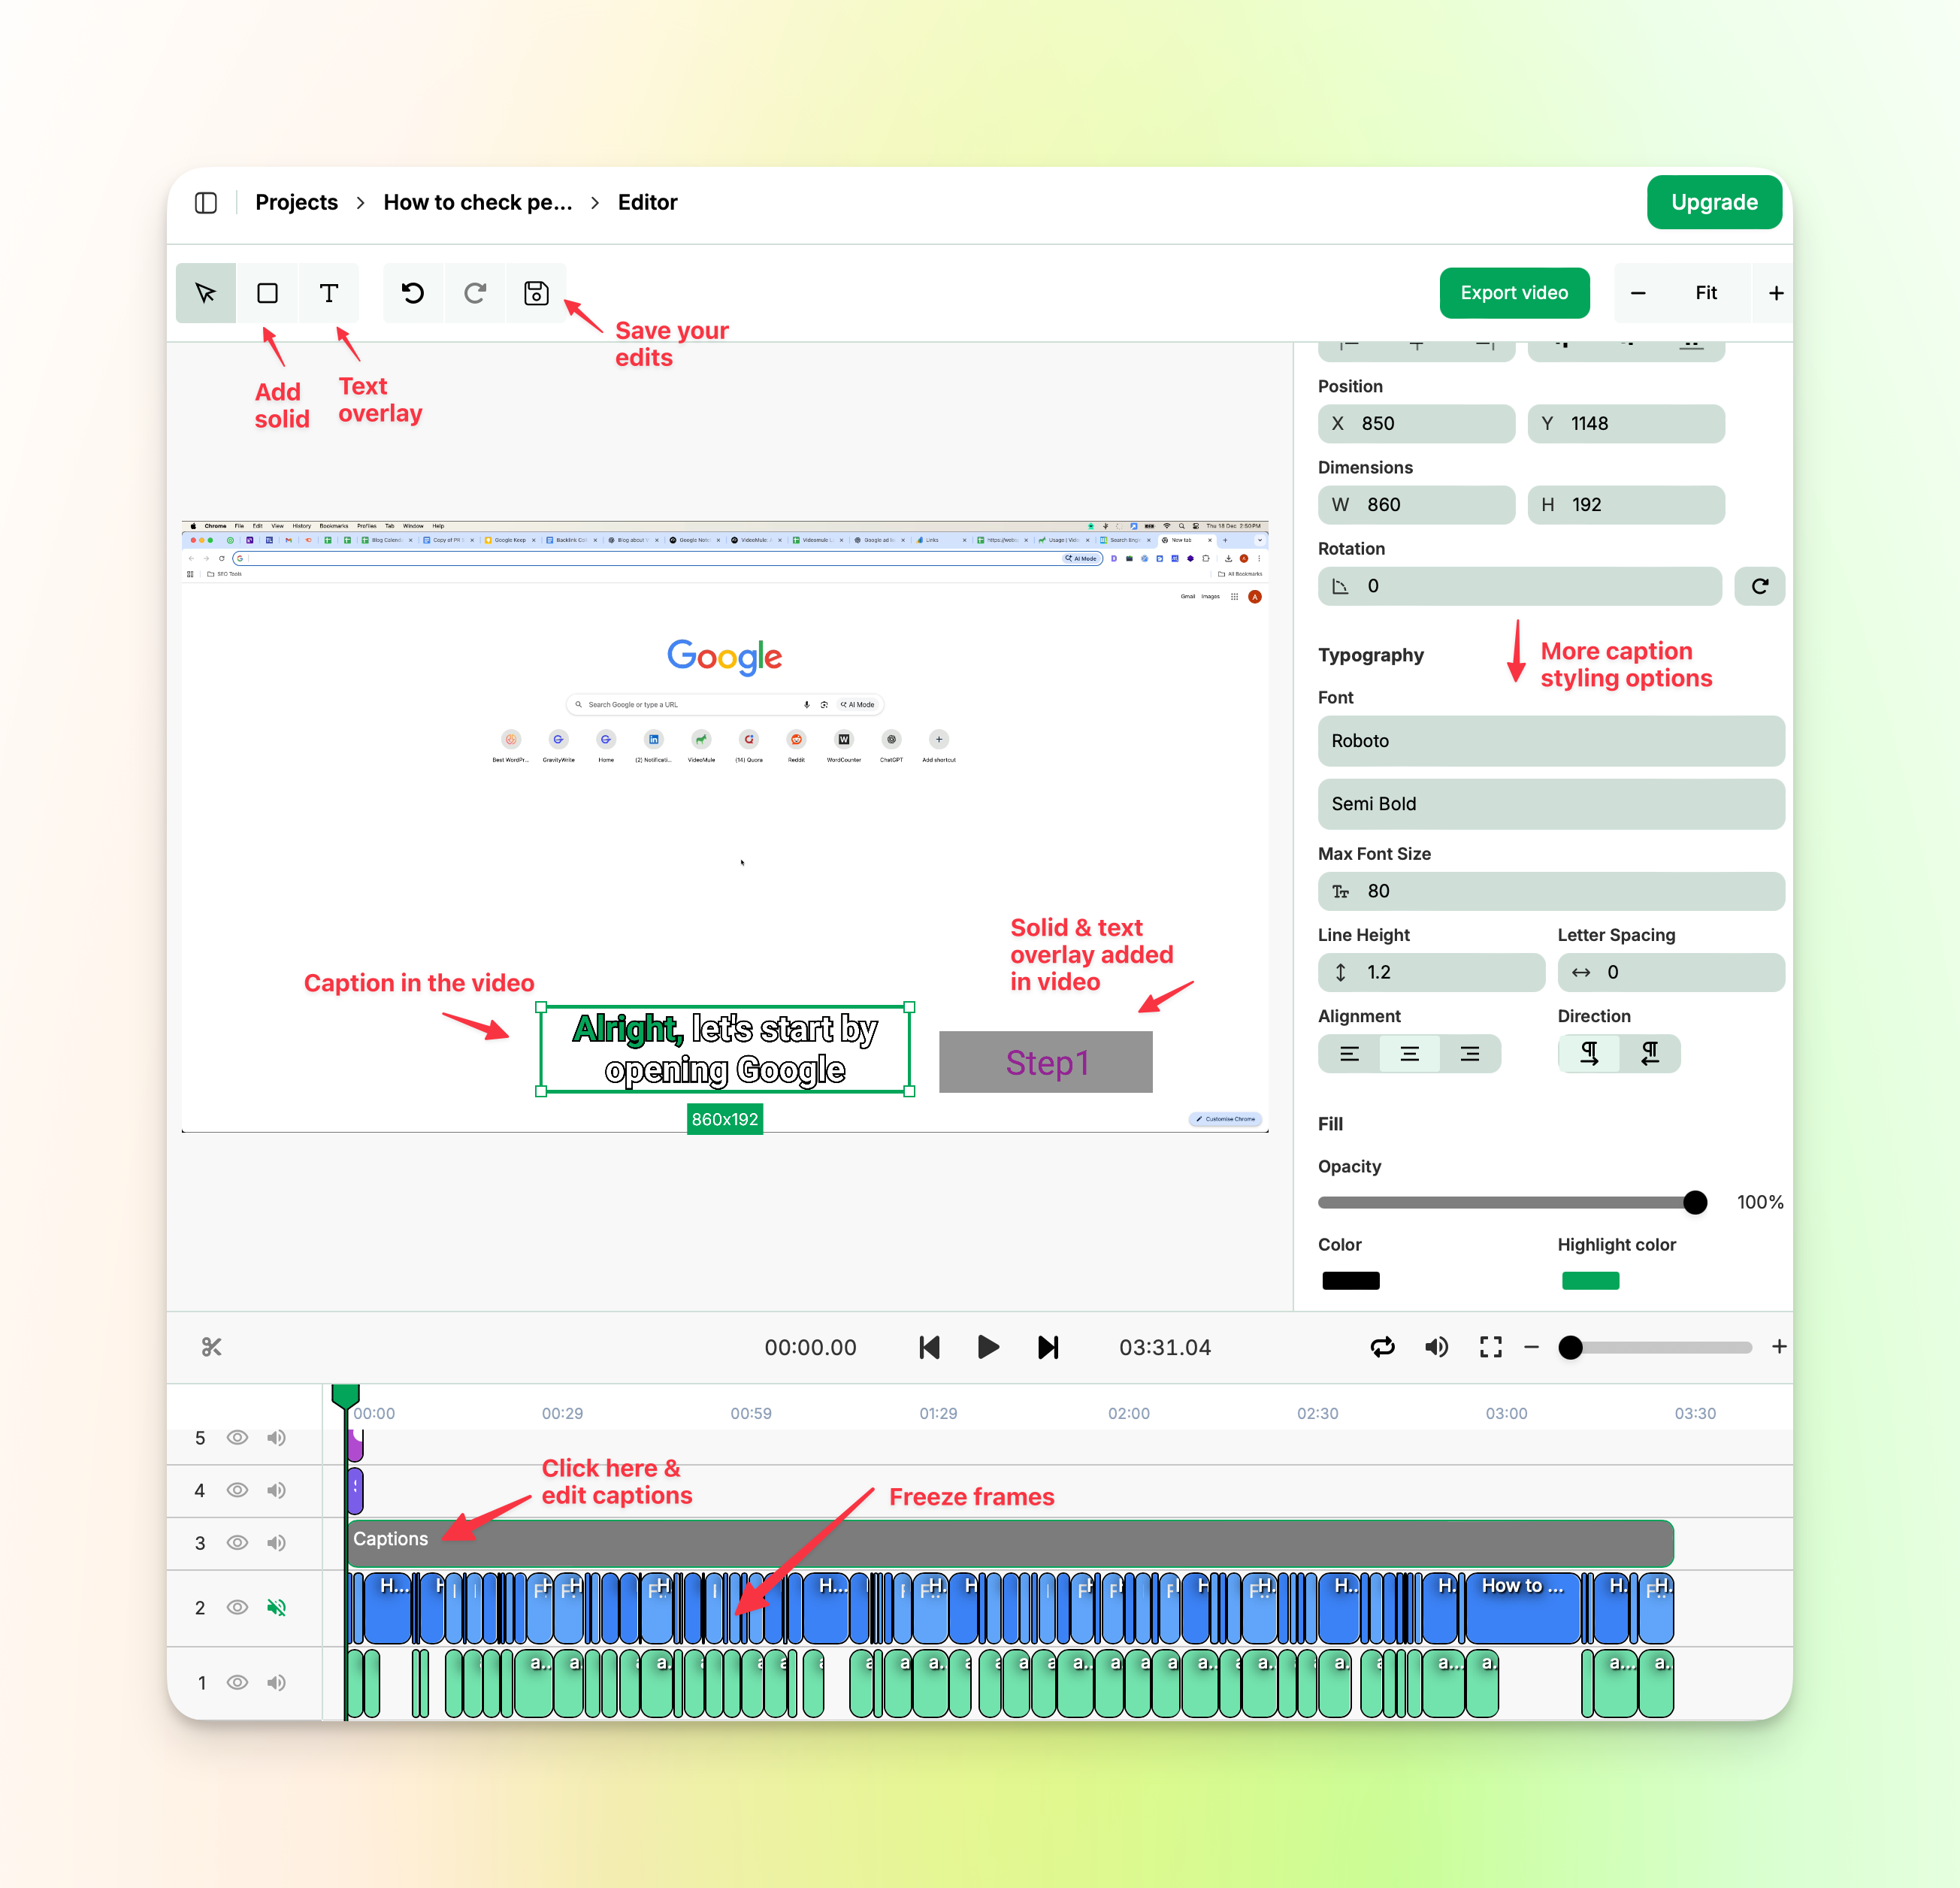
The editor displays your original video along the main track.
Your generated voiceover audio appears as separate segments synced to specific moments in the video.
Captions show up as their own layer that you can customize.
The timeline lets you see exactly how your voiceover lines up with each part of your video.
Understanding Freeze Frames
You might notice blue sections appearing throughout your timeline. These are freeze frames, and VideoMule adds them automatically.
Here's why they exist. Sometimes your voiceover for a particular segment is longer than the actual video footage for that moment. Instead of having the audio cut off or the video rush ahead, VideoMule pauses the video on the last frame of that clip while the voiceover finishes playing.
Think of it like someone pressing pause for you at just the right moment. The video holds still, your voiceover completes, and then everything continues normally.
You don't need to create these freeze frames yourself. VideoMule automatically calculates exactly where they're needed. This keeps your voiceover and visuals perfectly in sync without any manual adjustment.
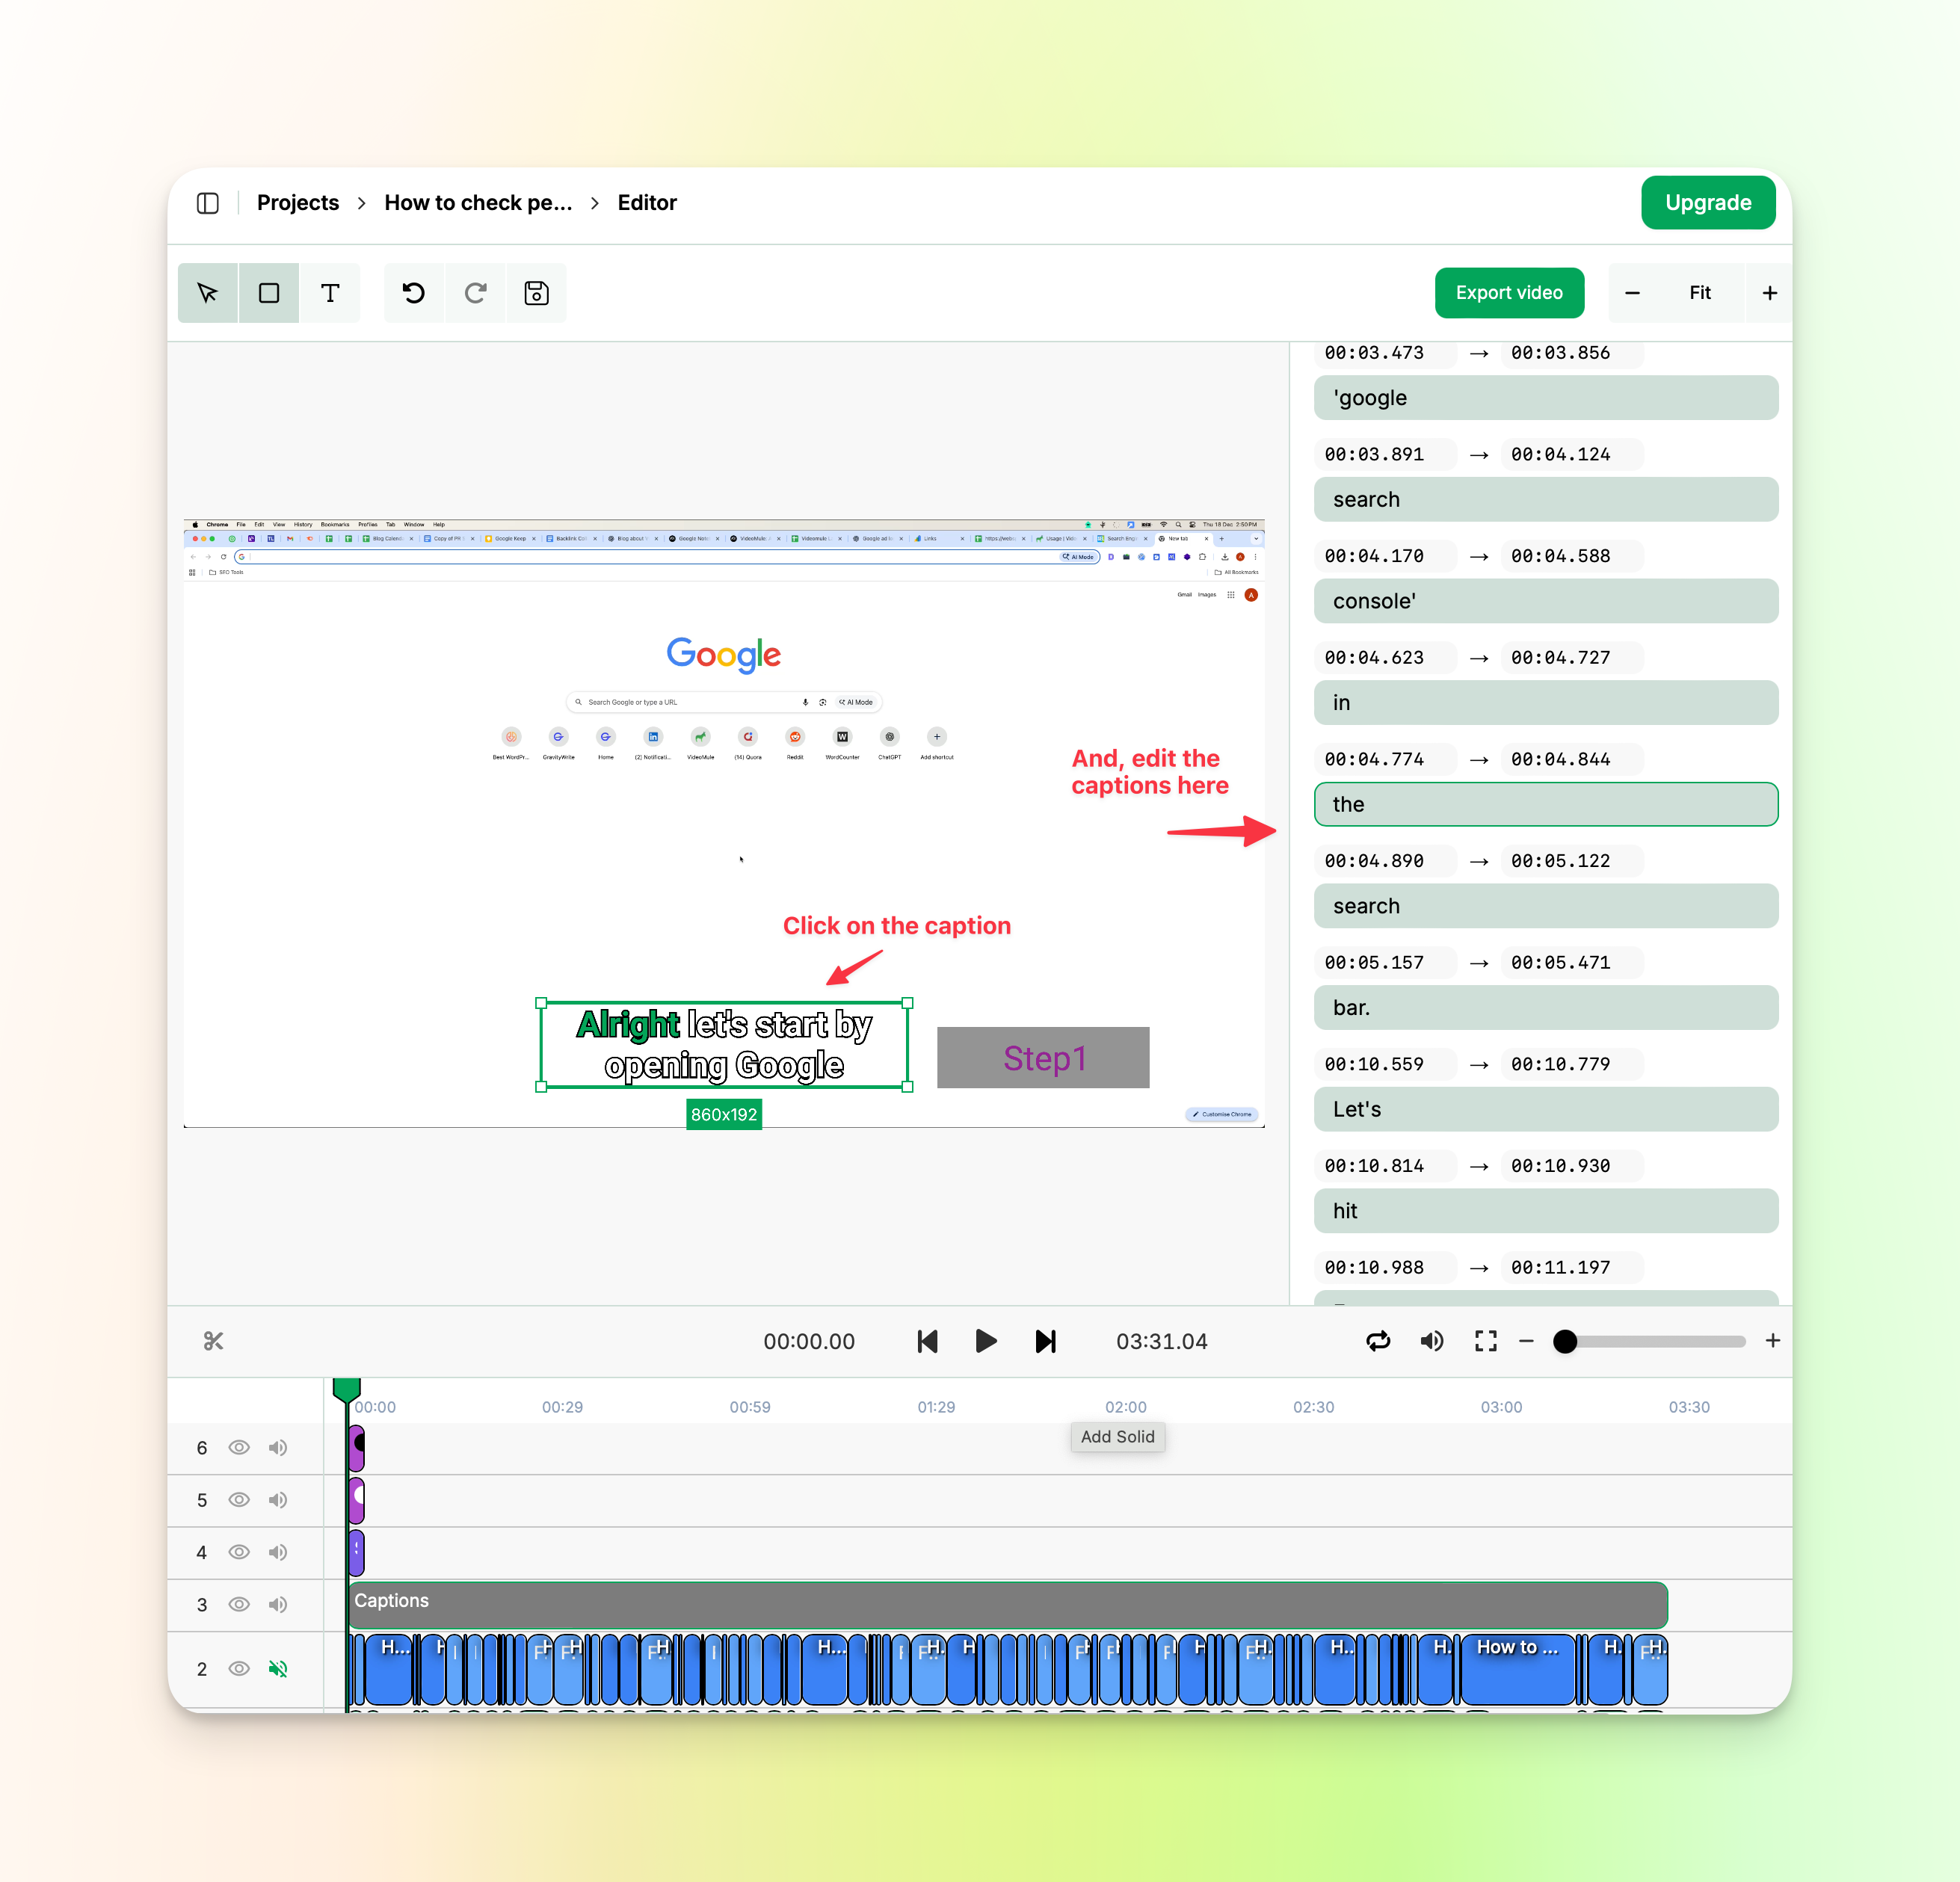
Working with Captions
VideoMule automatically generates captions for your video based on the script.
These captions appear word by word as the voiceover plays, giving your video a professional look.
The captions are placed on their own layer in the timeline. You can see them synced to the audio, and each word appears at the right moment to match what's being spoken.
Caption Styling Options
Your captions don't have to look generic. The editor includes styling options that let you adjust how your captions appear on screen.
You can change the font to match your brand or the style of your video. Positioning controls let you place captions where they work best without covering important parts of your footage.
Select the caption layer in your timeline to access these styling options. Any changes you make will show up in the preview so you can see exactly how they'll look in your final video.
Adding Text Overlays & Callouts
Beyond captions, you can add custom text elements to your video. This is useful for titles, callouts, labels, or any other text you want to display at specific moments.
To add text, use the text option in the editor toolbar. You can then position your text element on the timeline to control when it appears and how long it stays on screen.
Once you've added text, make sure to save your changes so they're preserved in your project.
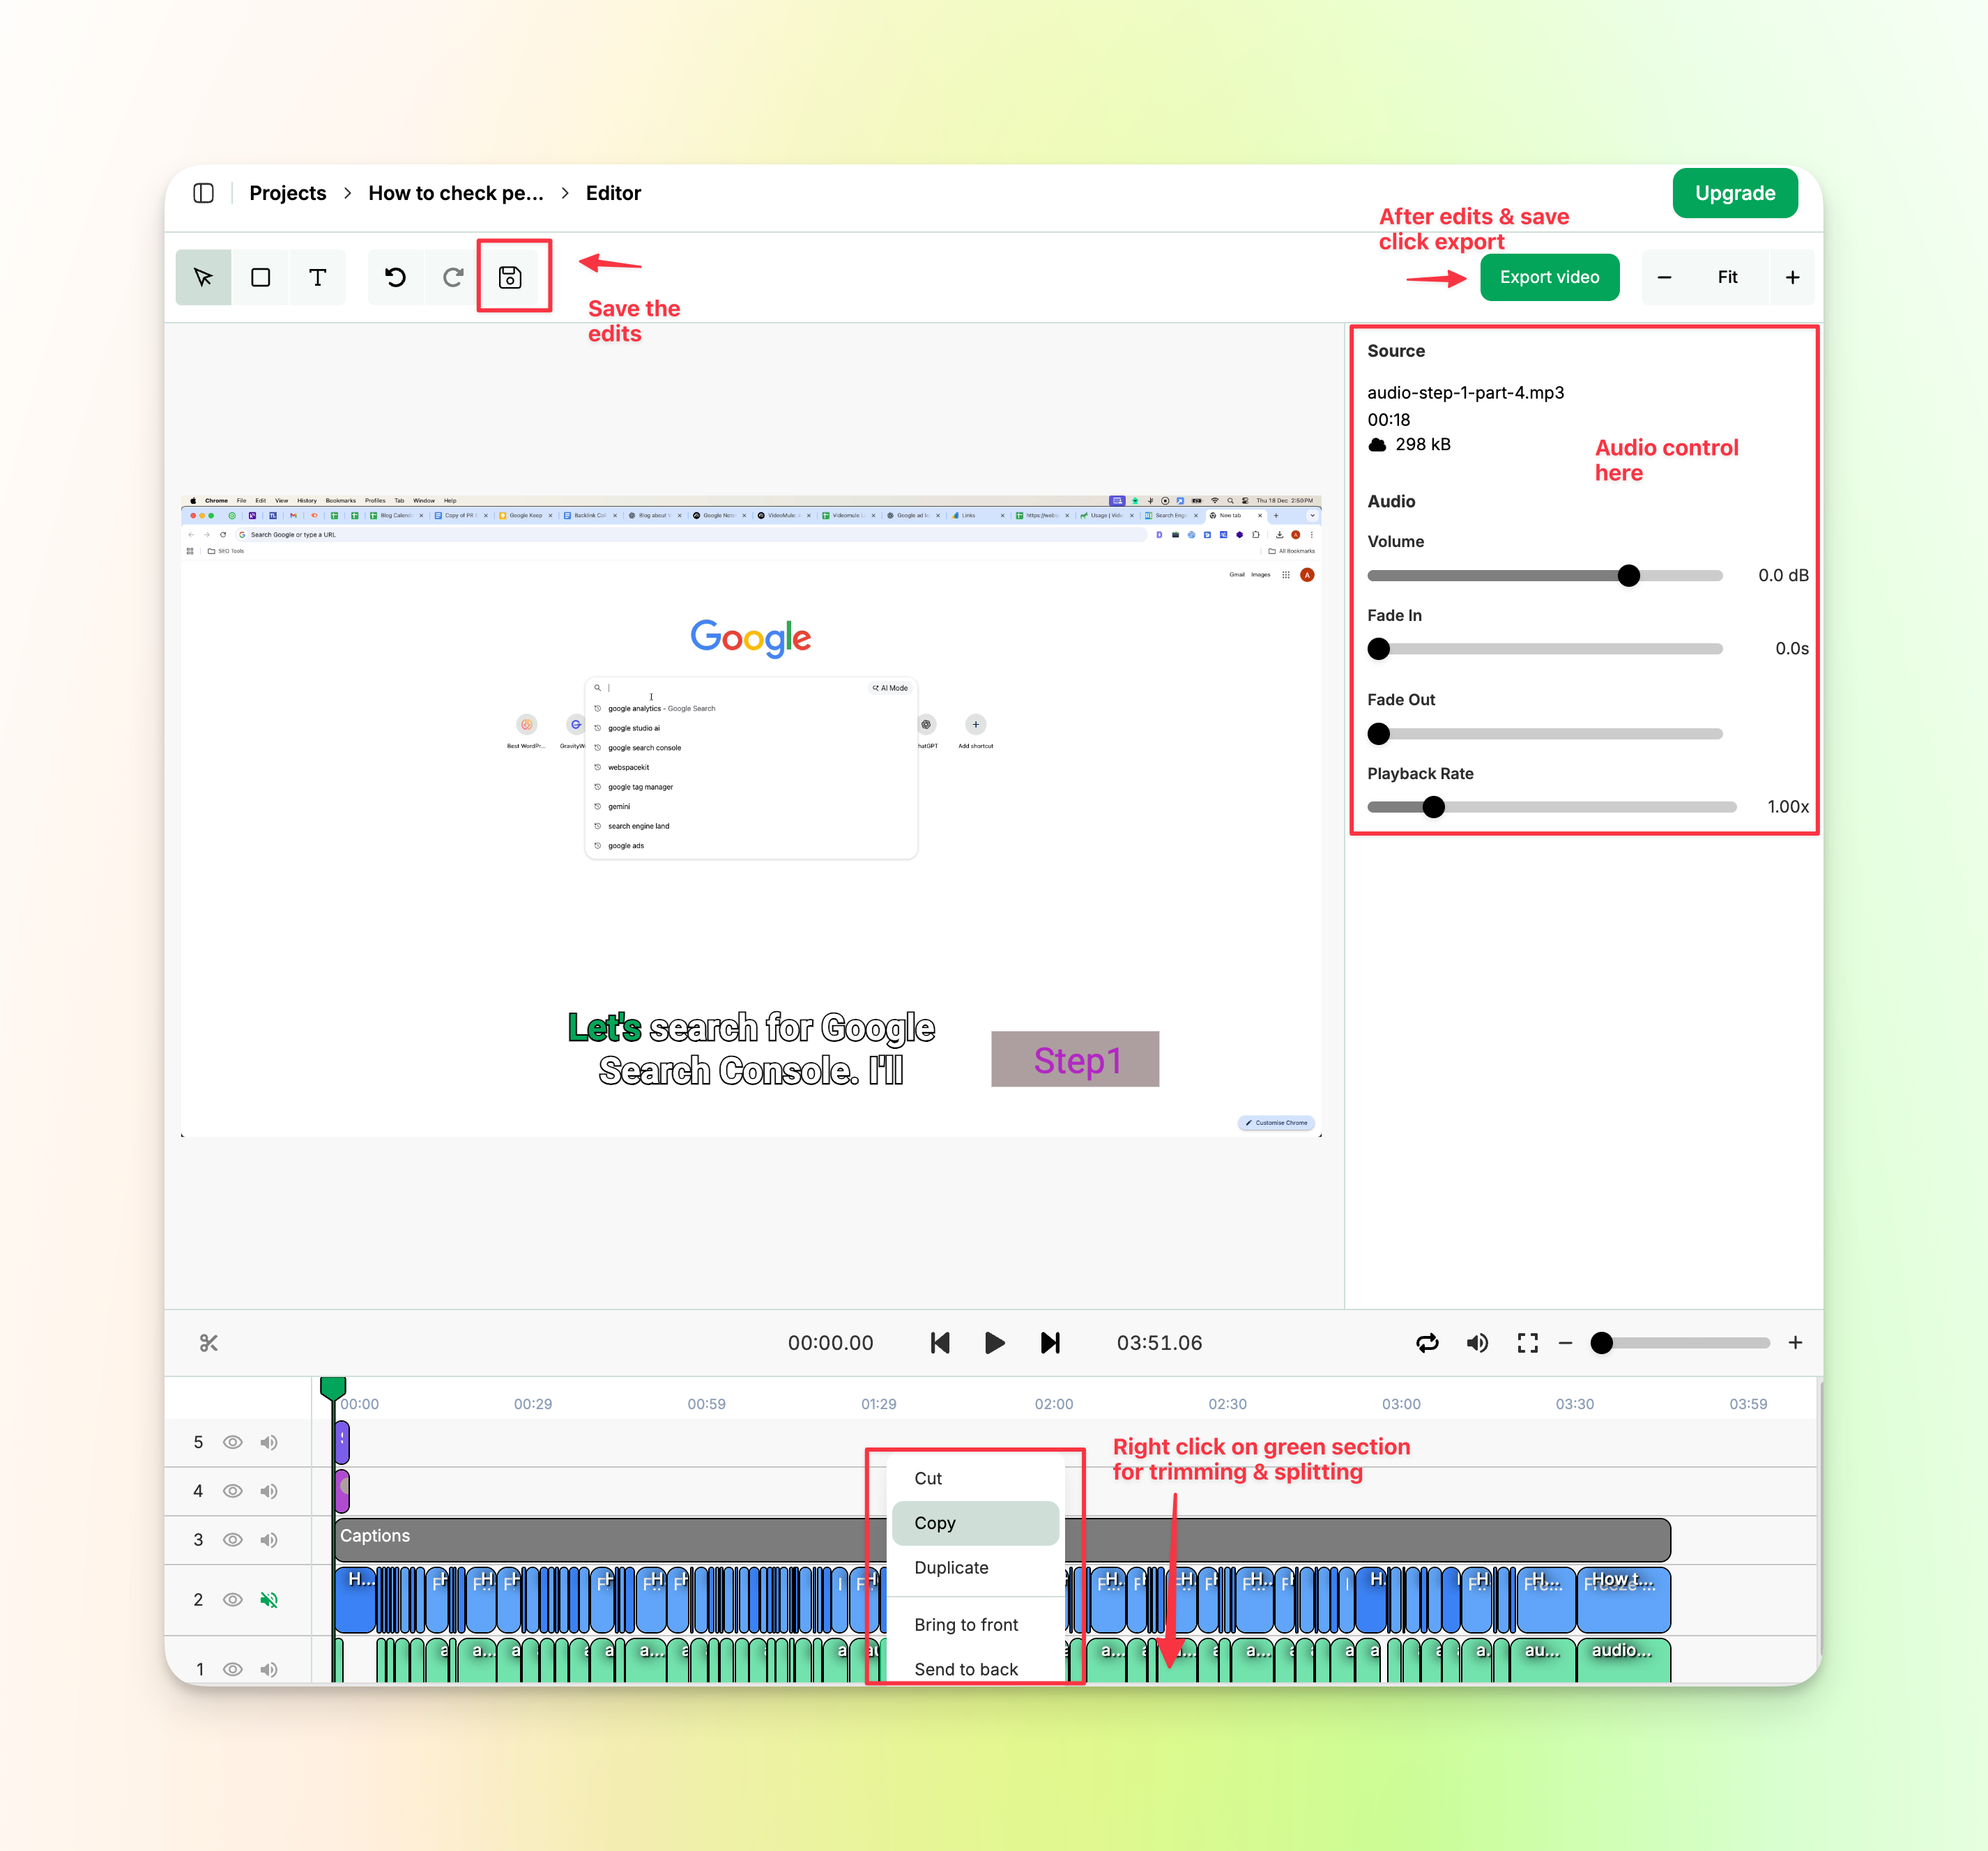
Trimming and Splitting Clips
The editor gives you the controls for adjusting your timeline.
Splitting lets you break a clip into separate pieces. This is helpful if you want to remove a section or handle different parts of your video differently.
You can also delete segments.
These controls give you flexibility to fine tune your video without starting over from scratch.
Audio Controls
If your original video had audio in it, that audio track will appear in the editor. By default, the original audio is muted so it doesn't compete with your generated voiceover.
You can unmute the original audio if you want to include it. This might be useful if your recording had important sounds or background audio you want to keep alongside the voiceover.
The mute & volume controls gives you full control over what audio makes it into your final video.
Saving Your Edits
The editor does not save automatically. You need to click the Save button to preserve any changes you make.
This applies to everything. Caption adjustments, text overlays, timeline edits, and any other modifications all require a manual save.
Before you leave the editor or start rendering, make sure you've saved your work. If you navigate away without saving, your changes will be lost.
The Save button is always available in the editor interface. Get in the habit of saving frequently, especially after making significant changes to your project.
Frequently Asked Questions
What are those light blue sections I see in the editor after generation?
Those are pause points. VideoMule automatically adds them where your voiceover clip is longer than the original video action. This makes sure the narration plays completely without getting cut off. The darker blue layer is the original video file uploaded by you.
Does the editor save my work automatically?
No. You need to manually click the "Save" button to store your changes. If you leave the page without saving, your edits will be lost.
Why does the video stop moving while the audio keeps playing?
This is a "Freeze Frame" (shown in light blue on the timeline). It happens when the voiceover script is longer than the video clip. The video pauses to let the audio finish so everything stays synchronized.
Can I edit what the captions say?
The captions are generated from your script. If you want to change the words, you'll need to edit the script before generating the video.
Do I need to save before rendering?
Yes. Make sure to save any changes before you start the render process. The editor doesn't auto-save, so unsaved changes will be lost.
Can I add background music to my video?
This feature is planned for a future update but is not currently available in the editor.